This guide lists the steps to manually configure and enable Okta SSO for your organization.

Configuring the RudderStack SSO App
- Log into your Okta application as an administrator. Then, go to the Applications page in the dashboard.
- Click the Create App Integration button to integrate Okta with RudderStack.
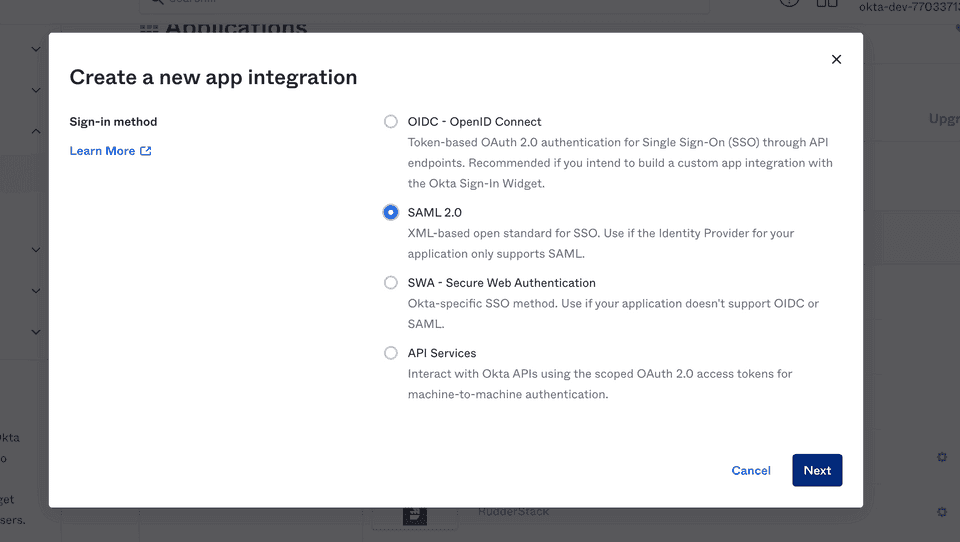
- Select SAML 2.0 sign-in method, as shown:
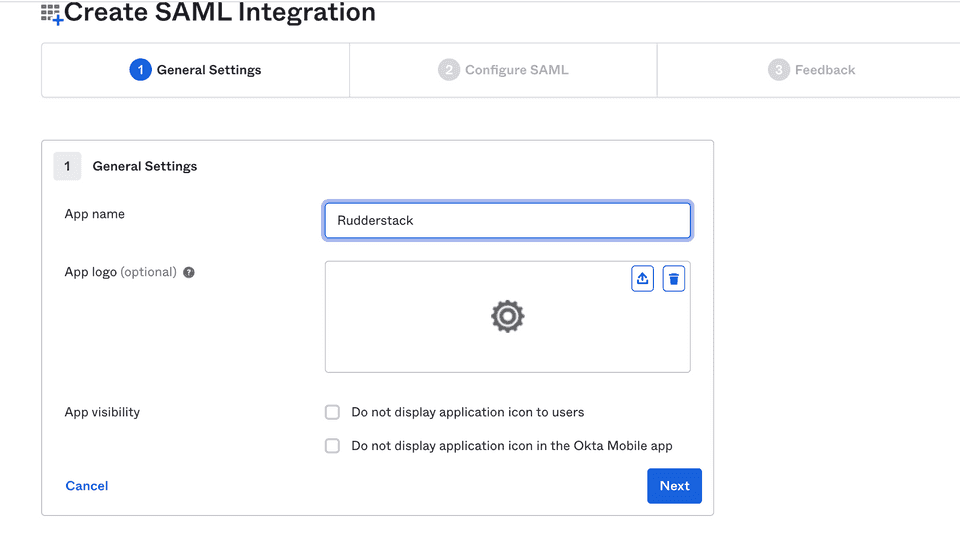
- Under General Settings, set the App name to RudderStack. Then, click Next.
SAML settings
Enter the following settings in the Configure SAML section:
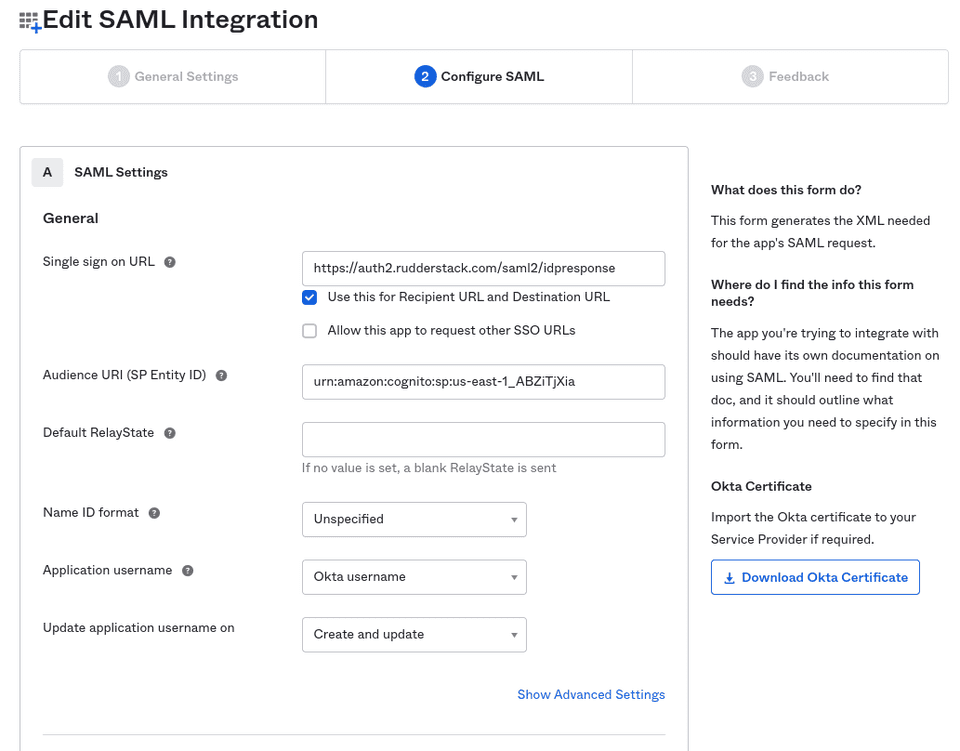
- Single sign on URL: Set this to
https://auth2.rudderstack.com/saml2/idpresponse.
- Audience URI (SP Entity ID): Set this to
urn:amazon:cognito:sp:us-east-1_ABZiTjXia. - Default RelayState: Leave this field blank.
- Name ID format: Select Unspecified from the dropdown.
- Application username: Select Okta username from the dropdown.
- Update application username on: Select Create and update from the dropdown.
Attribute Statements settings
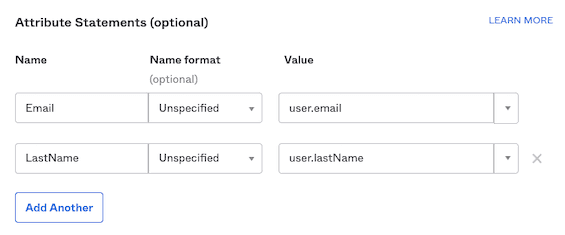
In the Attribute Statements section, you need to enter the following settings:
| Name | Name format (optional) | Default value | Comments |
|---|---|---|---|
| Unspecified | user.email | Set the value corresponding to your organization's user email. | |
| LastName | Unspecified | user.lastName | Although user.lastName is recommended, you can provide any other value here. |
In the next page, select the I'm an Okta customer adding an internal app option and click Finish.
The RudderStack Single Sign-On app is now created and you will be directed to the app's page.
Enabling SSO
The RudderStack SSO app supports dynamic configuration.
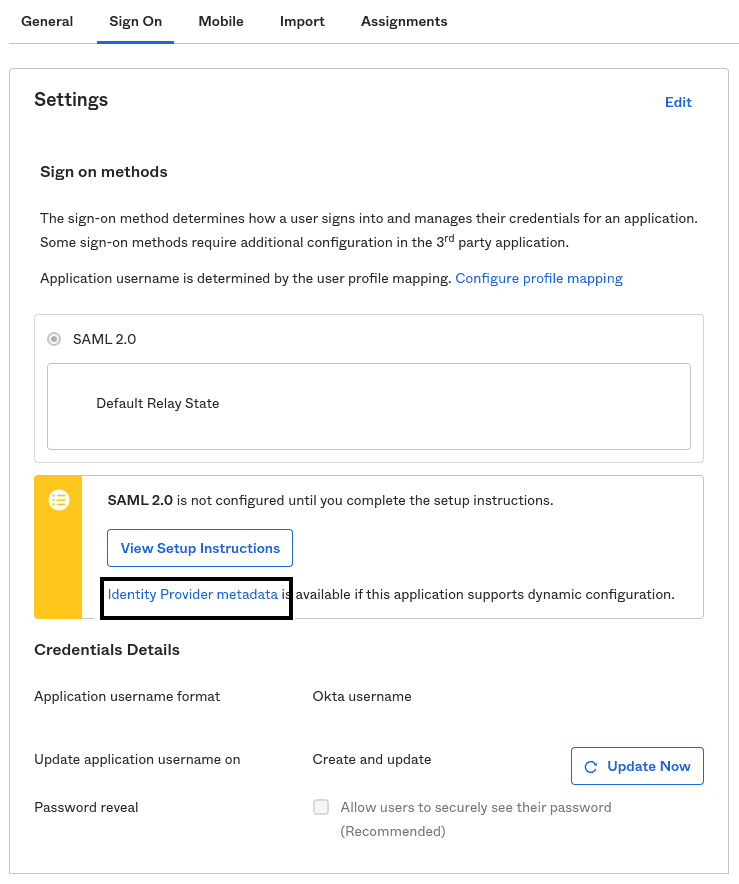
In the Sign On section of the RudderStack SSO app, right click and copy the URL associated with Identity Provider metadata under the View Setup Instructions button, as shown in the below image.
Share this URL with the RudderStack team to enable SSO for your organization.
/metadata.SCIM configuration steps
You can automatically grant RudderStack access to your users by configuring SCIM provisioning in Okta.
- Log in to Okta as an administrator.
- In the sidebar, go to Applications > Applications and select your SSO app.
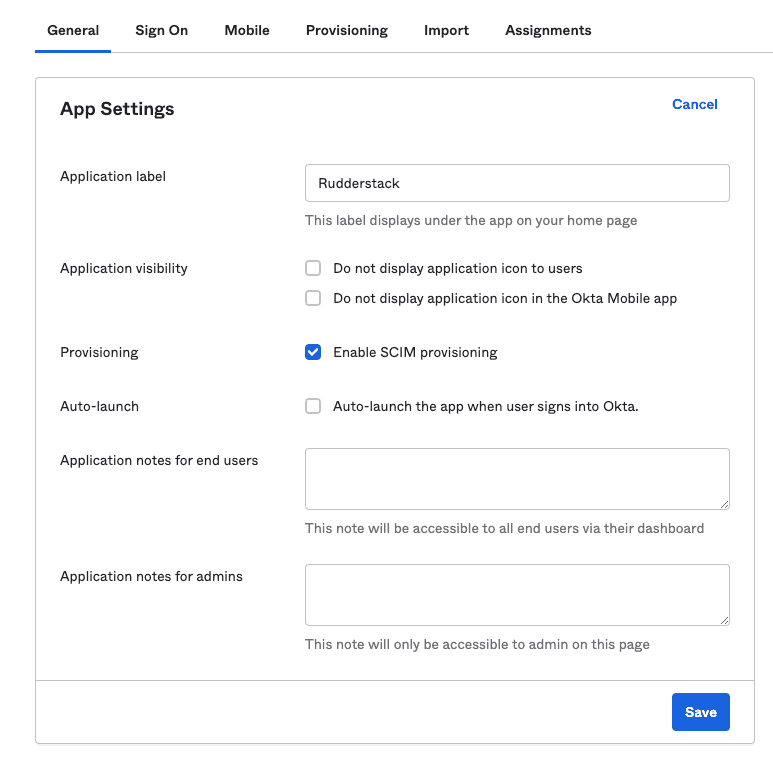
- Go to the General tab, click Edit and check the Enable SCIM provisioning option, as shown:
- A new tab called Provisioning will now be visible in the app settings. Go to Integration, click Edit and enter the following details:
| Setting | Value |
|---|---|
| SCIM connector base URL | https://api.rudderstack.com/scim/v2 |
| Unique identifier field for users | userName |
| Supported provisioning actions | Check the following settings:
|
| Authentication Mode | HTTP Header |
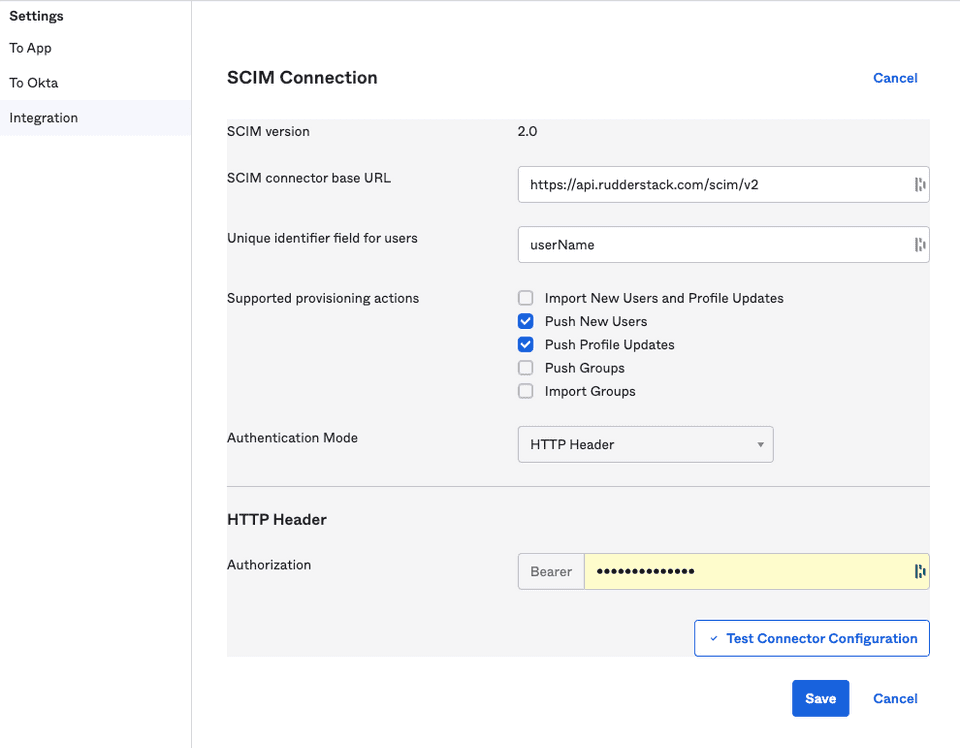
- Under HTTP Header, paste your personal access token with the Admin role.
- Click Save. Okta will send a test request to verify the configuration.
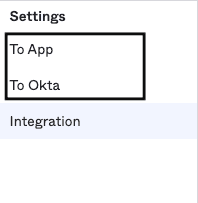
- Once the verification is complete, you will be able to see two new options, To App and To Okta, in the Settings sidebar, as shown:
- Go to the To App settings and click Edit. Then, enable the following Provisioning to App settings:
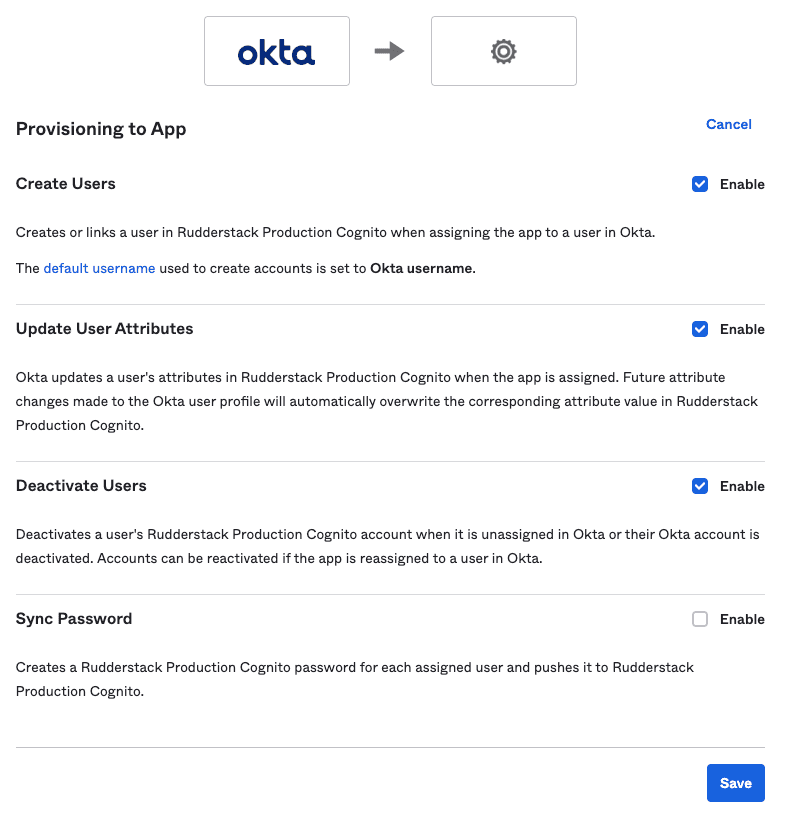
- Scroll down to the attribute mappings section and click Show Unmapped Attributes.
- Unmap all the attributes one by one by clicking the X icon, except the following mandatory attributes:
- Display name
- For Display name and Email, click the edit icon and set the Apply on field to Create and update.

- Click Save to finish the configuration.
- Go back to your app settings, click the Sign On tab and click Edit.
- Under Credentials Details, set Application username format to Email, as shown:
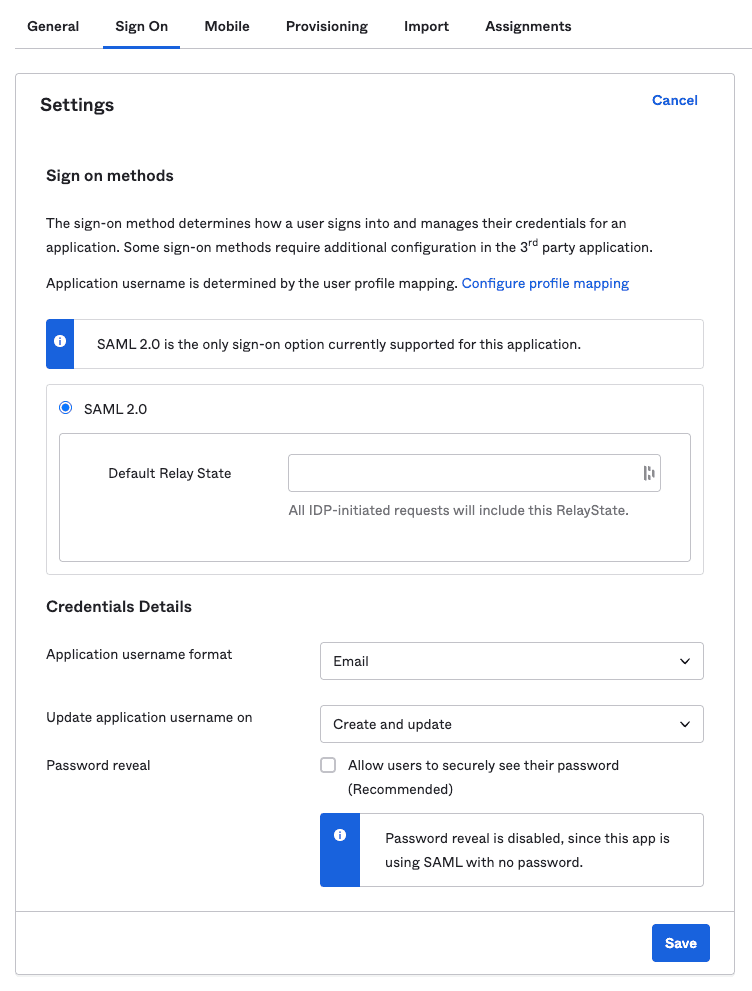
- Finally, click Save.
Contact us
For more information on the topics covered on this page, email us or start a conversation in our Slack community.